Beyond The Rainbow: Practical Tips for Designing High-Dimensional Flow Panels
Spectral flow cytometry is an incredibly powerful and increasingly accessible tool, allowing researchers to identify and study rarer cell populations, monitor responses to stimuli across multiple cell types, and perform high-dimensional analysis on large flow datasets.
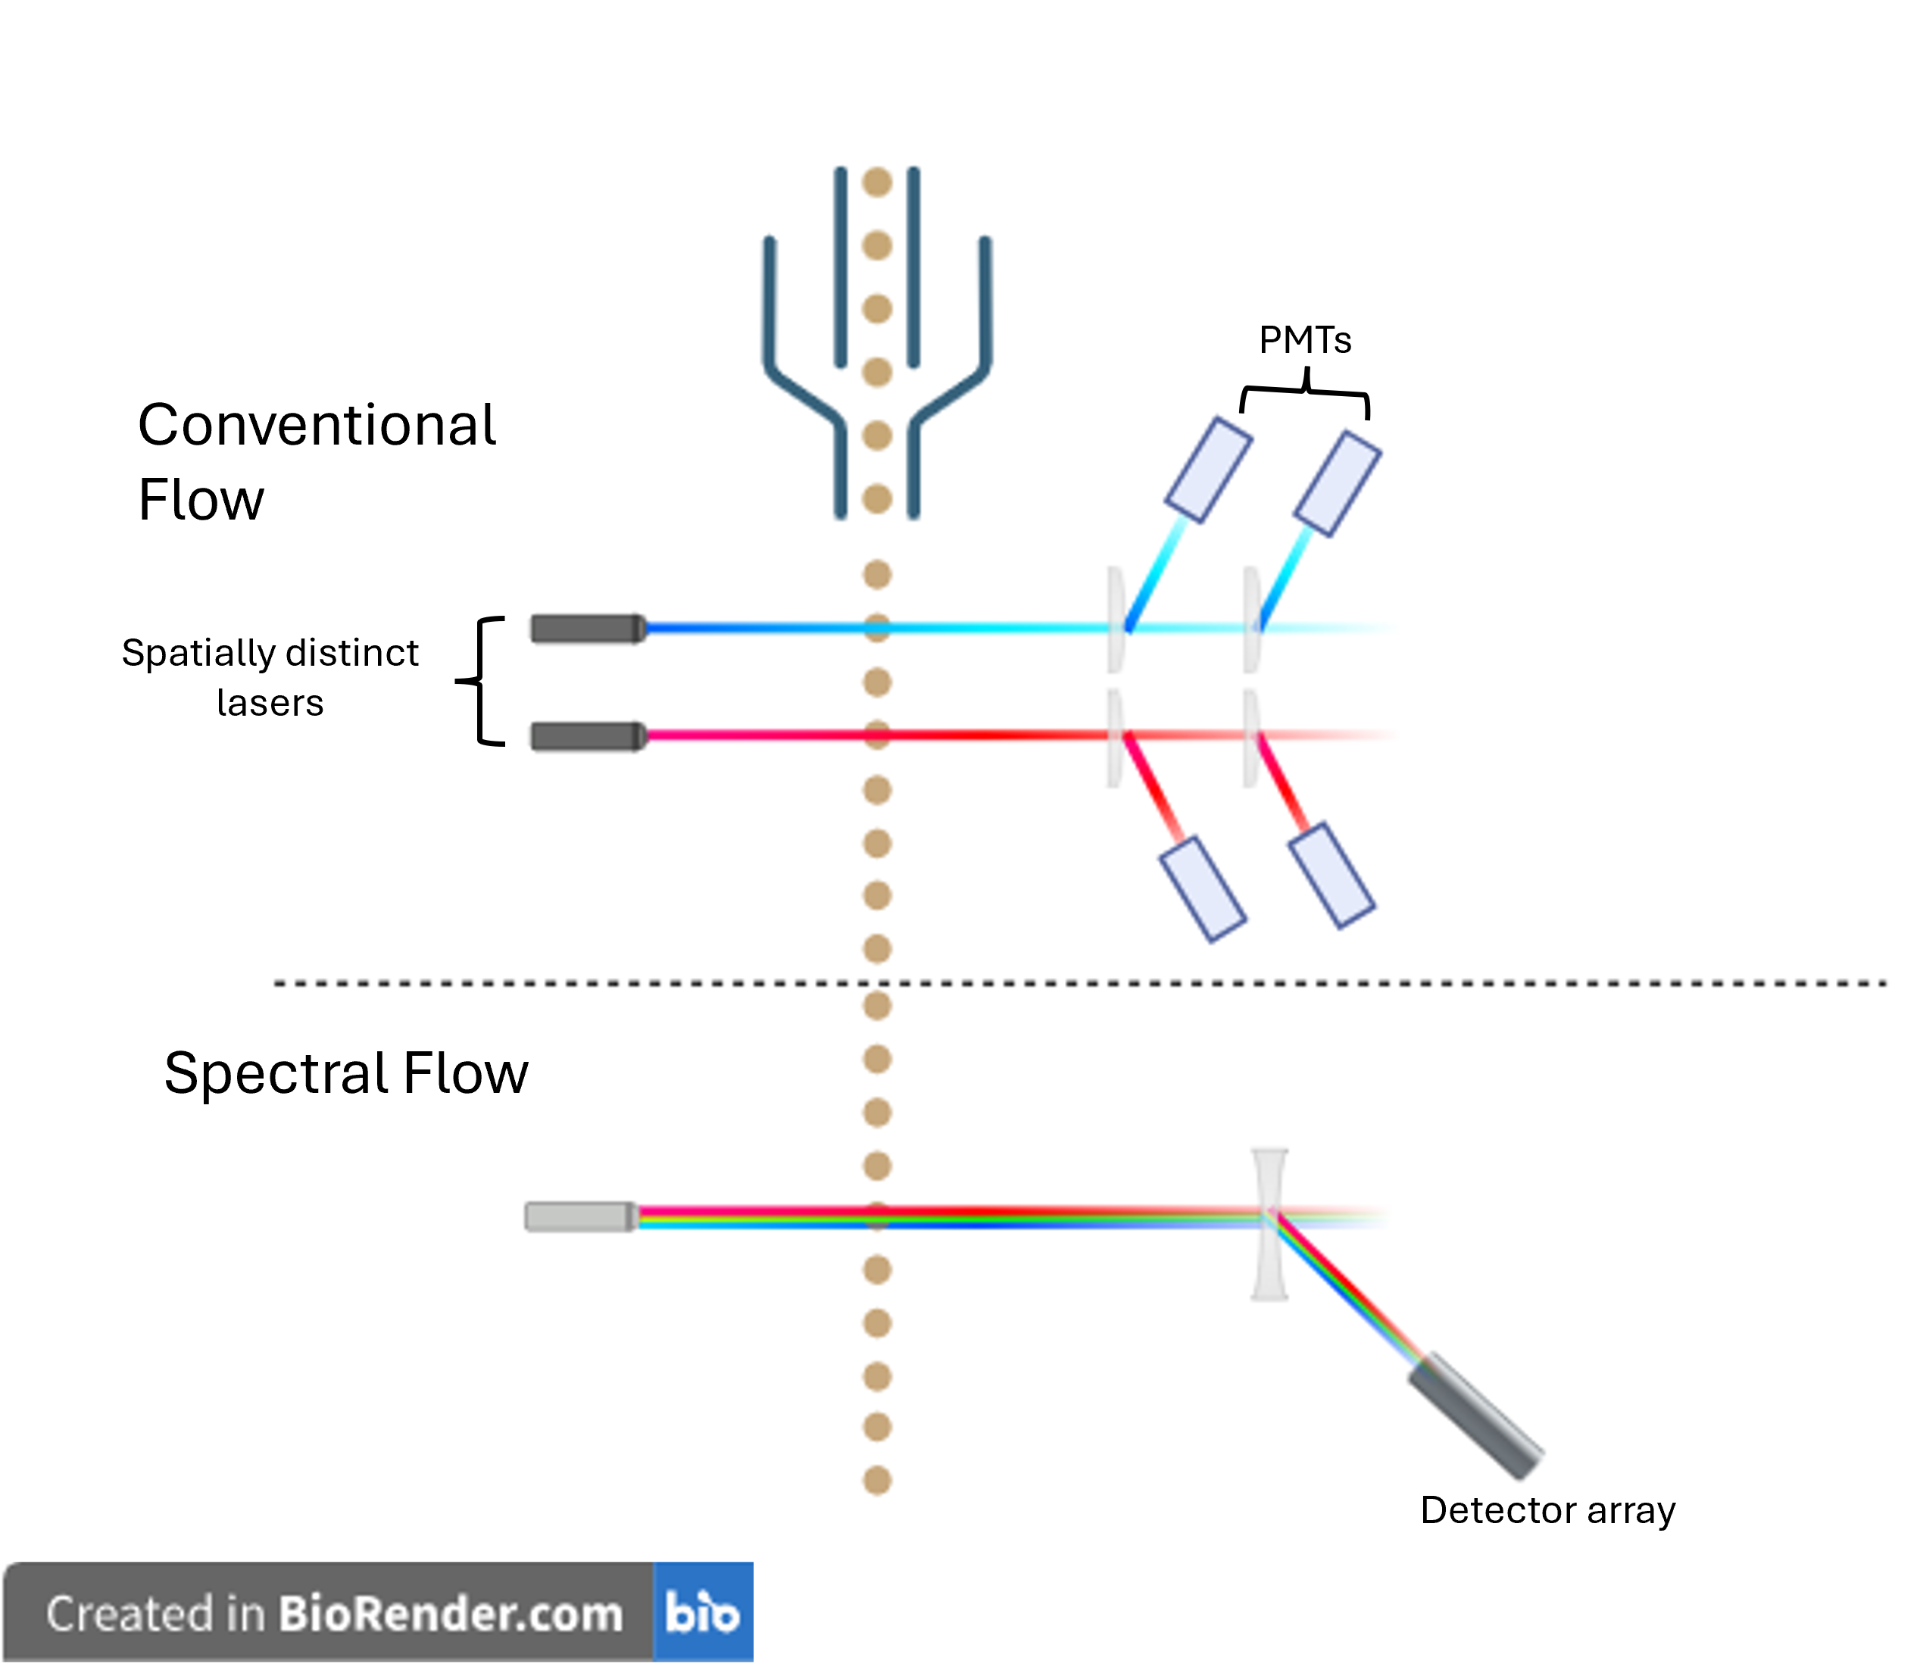
Conventional flow cytometry relies on spatially separated lasers to excite fluorophores, with emitted light directed through a series of dichroic mirrors to photomultiplier tubes (PMTs). Each PMT detects light within a specific wavelength range, enabling identification of individual fluorophores based on peak emission.
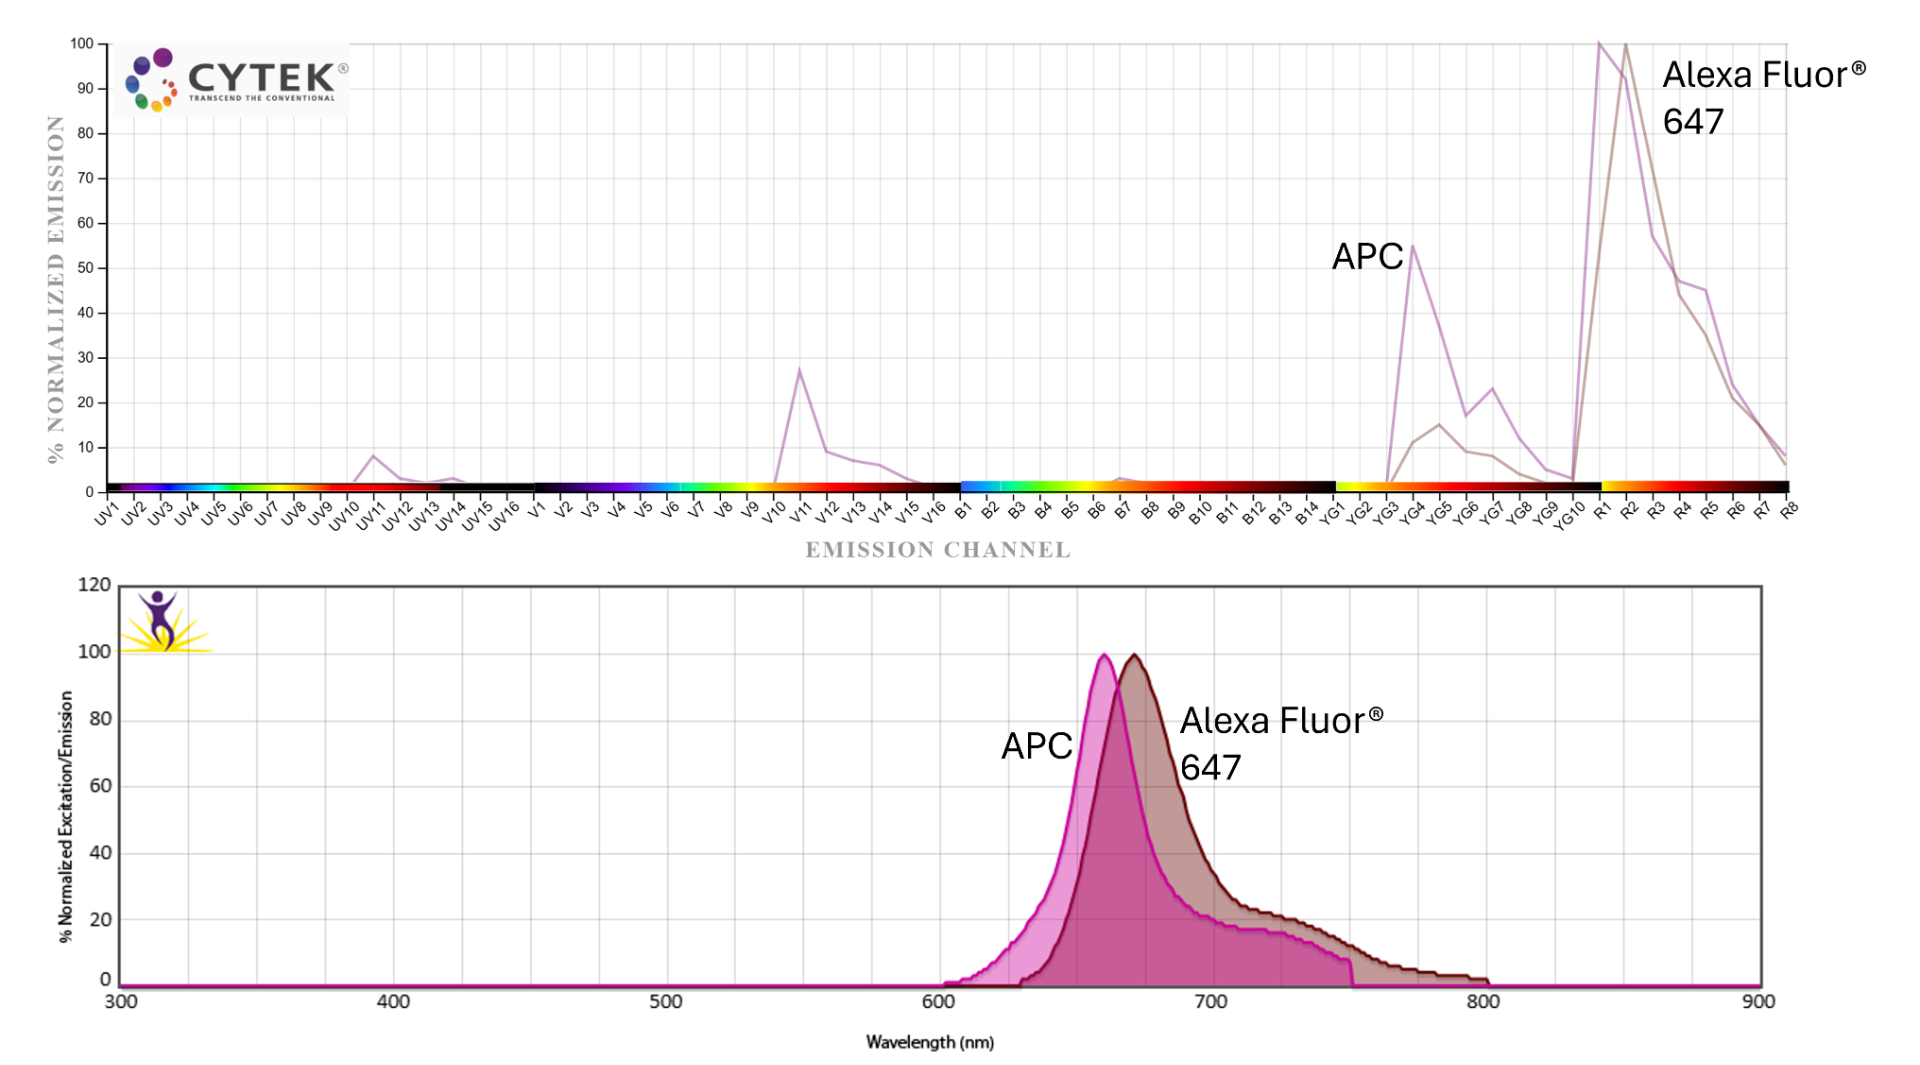
Spectral flow cytometry, on the other hand, uses prisms or diffraction gratings to disperse emitted light across a detector array, capturing the full emission spectrum of each fluorophore known as its unique spectral fingerprint. During analysis, computer algorithms unmix the spectra, allowing us to differentiate fluorophores with overlapping peak emissions, something not achievable with conventional compensation alone.

All this technical power comes with its own pitfalls, and designing high-complexity panels, especially for translational patient sample analysis, can be tricky! I've led the design, optimisation, and validation of 30+ colour spectral flow cytometry panels for patient sample analysis, and here I'll talk through a few key things I learned along the way. Each of these could be its own deep dive (and might be in future posts), but this one is a high-level overview for anyone starting out or refining their approach.
The Why Before the How – Starting Points for High-Dimensional Panel Design
Understanding what data you want to generate and what questions you want to answer is the first place to start when designing a panel.
Previously, I was challenged with designing a panel to monitor immune responses to a gene therapy product in human PBMCs and tumour samples. The goal was to analyse responses across as many cell subsets as possible, which meant incorporating a broad set of surface markers and building a fairly complex gating strategy.
Multiple challenges popped up throughout development — from fluorophore and antibody clone interactions to unmixing artefacts and autofluorescence. Once the team had a clear strategy and a panel design workflow in place, these issues were identified and resolved faster with each new iteration.
Starting Your Design
Once you know what you're looking for — and in which samples — you can begin listing the markers you'll need. There are some brilliant open-access OMIP publications out there that detail spectral flow panels, including antibody clones, fluorophores, sample types, and gating strategies. These are a great starting point; you can test panels as-is, adapt them to your own sample types, or swap out markers to better suit your needs.

Things to Keep in Mind for Patient Sample Panels
- Watch for antibody clone interactions, as these can impact spectral unmixing. If you can't avoid using interacting clones, consider adding extra staining and washing steps to your protocol to reduce interference.
- Be thoughtful with your fluorophore choices. Avoid using too many fluorophores with overlapping peak channels on markers within the same cell lineage. For example, if you're looking at T cell subsets, don't put similar fluorophores on CD45RA, CD45RO, CCR7, CD103, etc. Also, as with conventional flow, save your brightest fluorophores for rare populations and use dimmer ones for more abundant markers.
- Plan your unmixing strategy early. Your choice of reference controls (cells, beads, or both) will significantly impact your final data. In panels I've worked on, a combination of cells and beads has generally worked best — though honestly, figuring out that combination could be a whole blog post in itself.
- Test antibody concentrations. Start with the manufacturer's recommended concentration to confirm reactivity with your sample, then titrate to see if you can reduce background or improve separation while still capturing your population of interest.
Making Your Panel Regulatory-Ready for Translational Data
Designing panels for patient samples in a regulated or translational research context adds another layer of complexity. There's a lot more to say on this (future blog post incoming!), but here are a few essential principles:
- You need to know the data you're generating is reliable — that means robust internal controls and clear documentation.
- Assay validation steps like inter-assay and intra-assay reproducibility, and inter-instrument or inter-site consistency, are key.
- Rarer populations that are interesting to study but are proving tricky to validate can be reported as For Information Only (FIOs) data sets. These can be studied but not necessarily used to inform clinical trial decisions.
- Think early about how you'll design your analysis tools so they're scalable, reproducible, and compliant with regulatory expectations.
Take-Away Points
- Start by clearly defining the scientific question you want to answer.
- Plan your fluorophore selection carefully, especially within related cell subsets.
- Build your panel with validation and regulatory-readiness in mind from day one.

We can help support your spectral flow journey
High-dimensional flow cytometry is a powerful tool, but it needs careful planning to avoid messy data and months of troubleshooting. I hope these tips help you get started or refine your existing panels. In upcoming posts, I'll be diving deeper into validation strategies, spectral unmixing controls, and troubleshooting tips for stubborn panels.
If you're developing your own complex panels and want support with design, optimisation, or regulatory readiness, feel free to reach out — it's exactly the kind of work we love to help with at Salopian Scientific.
